Free Next Day Delivery Over £20 | Same Day Dispatch

Next-Day Delivery Over £20 | Same Day Dispatch
Free Next Day Delivery Over £20 | Same Day Dispatch
Next-Day Delivery Over £20 | Same Day Dispatch

Seeing "No Atomizer" on your vape display can be frustrating, but it's a common issue with straightforward solutions.
This message means your device isn't detecting the coil or tank. It can happen due to loose connections, a dirty or damaged 510 pin, or an improperly installed coil.
It’s a right pain in the arse when your device stops you from vaping for whatever reason.
When messages like “no atomizer”, “atomizer low”, “atomizer short”, or “check atomizer” pop up, you won’t be able to get started again until you’ve fixed whatever problem you’re having.
If you’re using a regulated vape mod or even just a pod kit with a display screen, encountering an error message is almost inevitable at some point.
These safety regulations are in place to prevent accidents, which is a good thing, but being at the mercy of your device’s electronics can be frustrating.
While more experienced vapers often know the quick fixes to resolve these issues, it can be confusing for beginners.
For instance, if your vape tank or pod is properly attached to the mod, why would the device display a message like "no atomizer"?
Different hardware manufacturers tend to use different error messages on their vape mods, which can make things even more confusing.
For example, you’ll get some brands that use “atomizer short” for a shorted coil, while another might say “check atomizer” to mean the very same thing — or as a blanket term for all atomizer issues.
Here at Vape Green, we want your vaping journey to run as smoothly as possible, so we’re going to go through some troubleshooting steps to fix those dreaded atomizer errors.
But before we get into it, what actually is an atomizer?
Well, here in the UK, we actually spell it as “atomiser”, but most manufacturers will use the American spelling in their devices’ error messages, unfortunately.
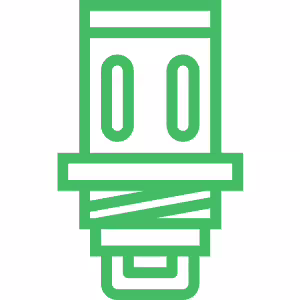
Anyway, light-hearted ribbing at our friends across the pond aside, “atomizer” is the fancier way of referring to your coil, and the two are often used interchangeably.
It’s the metal heating element that sits inside your vape tank or pod, and while they can vary in design or the type of alloy used, their function remains the same — turning your e-liquid into delicious plumes of vapour.
When you see a 'No Atomizer' or 'Check Atomizer error message
pop up, it usually means that your device isn’t detecting your pod or tank — or more specifically, the coil or atomiser at the connection point.
This is the same message you’d see if you tried to fire your device without anything attached to it at all.
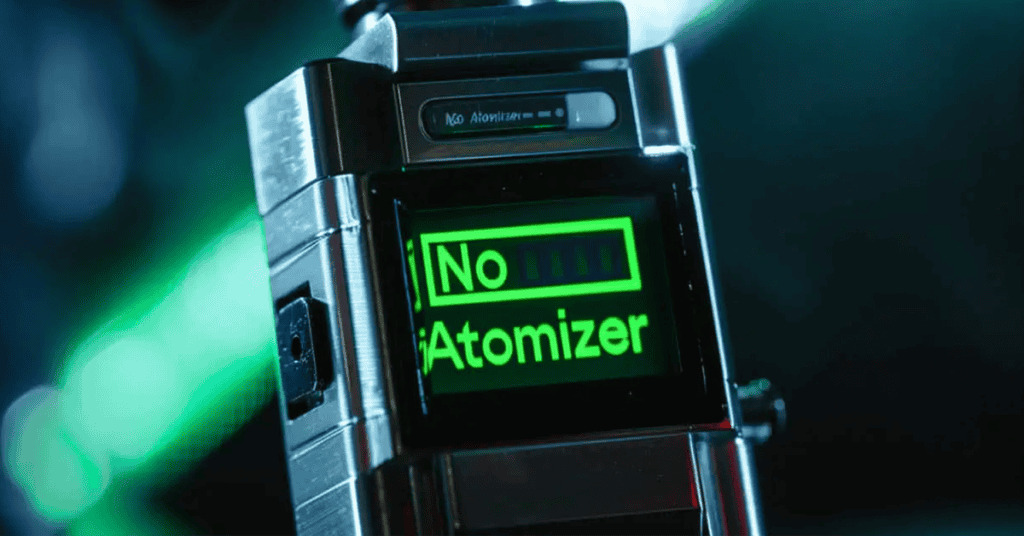
That said, if you seemingly have as properly connected tank or pod, it simply means something is preventing this connection from being secure .
This error might seem a bit odd, especially if you were vaping without any issues moments prior. Connection issues can develop over time, even if you haven’t physically adjusted your setup.
While less common, it’s not unusual for minor changes, such as refilling your tank, to slightly shift the atomizer head. Over time, these small movements can lead to a disconnection and trigger an annoying error message.
This could be due to a faulty vape coil, a flimsy connection on your rebuildable, or the coil itself isn’t properly fitted into your vape tank or pod (if it's a removable coil). It could also be that it’s missing an insulator.
Speaking of rebuildable vape coils, you might also be slightly misjudging the size of your build, which can cause your coil to come into contact with the chamber and “short out”.
This will likely lead to a “no atomizer”, “atomizer short” or “check atomizer” message on your vape, and might mean you need to buy a new coil.
Most modern atomizers that you’ll come across utilise PEEK insulators to separate the positive and negative connections.
If these insulators get damaged, it can cause a short circuit, which may trigger an 'atomizer short' error or a similar message displayed on your device.
Not all vape mods have the best connection at their 510 pins. This can be due to a multitude of reasons.
Maybe you’ve got a device that isn’t very well designed, or perhaps it’s faulty and managed to slip past quality control at the factory.
Whether it’s poor manufacturing, bad grounding (electrical connection between the components in your mod), or a positive 510 pin that’s too shallow or deep, a bad 510 connection is one of the most common causes of an atomizer message.
Just like any other electronic device, sometimes the components in your vape can just malfunction. Almost all vapers will have their mod die on them at some point, it’s why vape kits often come with a warranty.
So, if there’s no visible damage to your device and it’s still displaying a message saying “No Atomizer” or something similar — no matter what tank or pod you install — , then it might have something to do with the chipset inside.
Some vapers can be pretty clumsy (I know I am). Don’t be too hard on yourself over it, accidents happen!
However, it’s important that you handle your vape mod with extra care, as these frustrating “No Atomizer” messages can often come as a result of a damaged device acting up.
One thing to avoid is over tightening your atomizer. Many vapers mistakenly tighten their atomizers excessively, especially when encountering "no atomizer" errors, thinking it will resolve the issue.

That said, overtightening it can break the 510 pin or snap the internal ground wire, causing further complications
Most "no atomizer" errors are due to other factors, so tightening your atomizer should be done carefully and only as much as necessary to secure it without forcing it.
E-Liquid leaking into the mod is another common issue that can do a lot of damage. If your atomizer leaks, vape juice can seep through the 510 pin or vent holes and onto the internal circuitry, potentially damaging the chip.
It’s essential to ensure that your atomizer isn’t leaking and to clean up any spills immediately to prevent e-liquid from reaching the sensitive components in your device.
And of course, dropping your vape is a sure way to damage it and cause problems. Even if there’s no visible external damage, an impact can cause internal connections to break, disrupting the mod's functionality.
While these internal issues might not be immediately apparent, they can lead to erratic performance or errors over time. Handling your mod with care and avoiding unnecessary impacts will help preserve its longevity and performance.
Even if your mod’s 510 connection and coil placement appear to be in perfect condition, you might still encounter error messages like "no atomizer" or "check atomizer." In such cases, the issue may lie with the resistance of your coil.
Every regulated mod is designed to operate within a specific resistance range, which is typically listed in the device’s specifications.

If your coil’s resistance falls below the mod’s minimum threshold, the device will not fire as a safety precaution.
For instance, if your mod has a minimum resistance limit of 1.0Ω and your coil’s resistance is lower than that, the device will display an error and refuse to function.
This safety feature is in place to prevent the mod from attempting to fire an incompatible coil, which could lead to overheating, damage to the device, or even a safety hazard for the user.
While the issue is likely related to your tank or atomizer, it's important to pinpoint the exact cause before attempting a fix. The simplest way to do this is by testing your setup with different components to narrow down the source of the problem.
Start by attaching your mod to a different tank. If your vape mod works perfectly with the new tank, the issue lies with the original tank. Conversely, if the mod still doesn’t function, the problem is likely with the mod itself.
Similarly, you can test your tank on another mod. If the tank works fine on a different mod, the problem is with your original mod. However, if the tank fails to work with a new mod, it confirms that the issue is with the tank.
This method allows you to identify whether the fault lies with the tank or the mod, enabling you to take the appropriate steps to resolve the issue effectively.
The most common reason for this issue is that something isn’t properly connected. Start by checking whether your tank is securely attached to your mod’s connection point.
Unscrew the tank completely, then reattach it carefully, ensuring it’s screwed on snugly but not overtightened. Once it’s reconnected, try firing your device again.
On some mods, attaching a tank will trigger a prompt asking if you’re using the same coil as before or a new one. If this message doesn’t appear, attempt to fire your device again to see if the error persists.
If this doesn’t resolve the issue, the problem might lie with the connection between your coil and the tank itself, rather than with the tank’s connection to the mod.
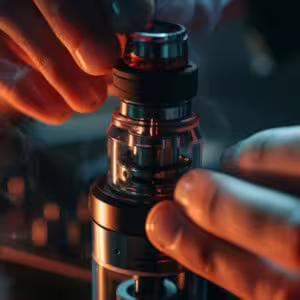
To check this, you’ll need to access the atomizer head by unscrewing the base of your tank. In some cases, you might need to empty the tank of vape juice first to avoid spills.
Locate where the coil connects to the tank’s base. For screw-in coils, carefully remove the coil by unscrewing it, then screw it back in securely.
Make sure the coil connects cleanly and avoid cross-threading. While the coil is out, it’s a good opportunity to clean both the coil and the tank’s connection points to ensure optimal contact.
To ensure proper alignment, place the coil in its position and turn it counterclockwise (as if you’re unscrewing it) until you hear or feel a distinct click—this indicates the start of the threading.
Once aligned, turn the coil clockwise to screw it in firmly but gently.
Reassemble the tank and attach it to your mod. Now try firing the device again to see if the problem is resolved.
If the issue persists, further troubleshooting steps may be required, such as testing with a different coil or tank.
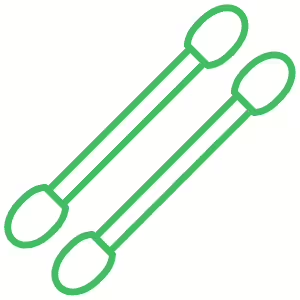
If you're still getting the same error message —or simply want to ensure you’ve covered all possibilities— it’s worth giving your coil a quick clean.
There’s no need for an intensive cleaning process, like soaking it in hot water and letting it dry for a day.
Instead, grab a cotton bud or paper towel (some rubbing alcohol will come in handy too), and carefully clean around the base of the atomizer head and its threading, focusing on the points where it connects to the tank.
It’s also a good idea to clean the area of the tank where the atomizer head screws in, as dirt or residue here can prevent a proper connection.
While you have your cotton bud handy, clean the 510 connection at the base of the tank—the part that attaches to the mod—and the mod’s corresponding connection point.
Any debris or buildup in these areas can disrupt the electrical connection, potentially causing a “No Atomizer” or "Check Atomizer" message.
Additionally, if any vape juice has leaked into these areas, it could interfere with the connection, so make sure to clean thoroughly.
Once cleaned, reassemble your tank, reconnect it to your mod, and test the device again. If it works as expected, you’re all set!
However, if the problem persists, it could indicate a more complex issue requiring further investigation.
If cleaning or reconnecting hasn't fixed your atomizer error, then it might just be that your coil is past its lifespan (or it's faulty). In which case, it's time for a new coil.
You'll want connect your new coil correctly, ensuring it's making proper contact with your pod or tank's base.
This only applies if you're using a removable coil, if it's built-in then you'll have to replace your whole pod.
If you've tried this and you're still getting an atomizer error, then there's either a different problem with your tank or pod, or a hardware issue with your device or chipset.
One of the most common and easily fixable causes of a connection issue with your mod is the buildup of dirt, debris, or vape juice residue around the connection point.
Over time, even small amounts of grime can accumulate on the threading or the 510 connection, disrupting the electrical contact between your tank and mod. This disruption can lead to an atomizer error or your device failing to fire properly.
Cleaning the connection point is a simple yet essential step to maintain your device's performance and prevent unnecessary troubleshooting or damage.
By keeping this area clean, you ensure a solid connection, which is crucial for your vape to function as intended.
If there’s a significant e-liquid leak, using a paper towel to absorb the excess is a good idea — this not only helps clean up the mess but also prevents juice from seeping into the device’s internal circuitry, which could cause further issues.
After addressing any leaks, focus on clearing away any debris or residue that might be blocking the connection between the contact point on the bottom of your tank and the corresponding point on your mod. A clean connection ensures proper functionality and reduces the risk of persistent errors.
Older vape tanks often featured adjustable contact points at their base to ensure complete connection, and while it is technically possible to adjust the height of the contact point on your mod, it’s not generally recommended.
Most modern devices come equipped with spring-loaded contact points, which automatically adjust to create a secure connection. This means manual adjustments are rarely necessary unless you’re using an older device with a fixed contact point.
If your device is relatively new or still under warranty, it’s a good idea to reach out to the retailer before attempting any modifications.
They may offer a replacement or repair solution that won’t void your warranty. This is a safer and more reliable approach, especially if the problem lies with the mod itself.
However, if you’ve ruled out all other potential causes and confirmed that your tank works perfectly with a different mod, you might consider gently raising the contact point on your mod as a last resort. This process requires a precision flathead screwdriver.
Locate the small space around the sides of the usually gold-plated contact point where you can insert the tip of the screwdriver.
Gently nudge the contact point upward, moving it slightly on one side and then repeating the process on the opposite side.
Proceed with extreme caution during this process. Adjust the contact point only a tiny amount at a time, testing the mod after each adjustment to see if the connection improves.
Overdoing it can irreparably damage your device, rendering it unusable. Attempt this adjustment only if all other troubleshooting methods have failed and you are willing to take the risk with your device.
If you use a rebuildable atomizer of some sort (whether that's a rebuildable tank or an RDA), the troubleshooting steps will be the same as above for the most part, aside from a couple of extra things to keep in mind.
Aside from the standard hiccps you might expect from a sub ohm setup (like a weak connection between your atomizer and device, e-liquid residue buildup, or a knackered 510 connector), one of the key things to look out for is whether the screws that connect your coil to the post are securely tightened.
Just like coils becoming a bit loose over time, your mod's screws can loosen after repeated use. If there isn’t an immediately visible issue, such as one of the coil’s “legs” being entirely out of the post, the next step is to simply grab your screwdriver and tighten the screws securing the coil.
Ensure the coil legs are properly secured and making proper contact within the posts. Once tightened, reassemble the mod and test it again to see if this fixes the issue.
Another potential headache for vapers who use rebuildables (RTAs in particular), is if their coil makes contact with the chamber surrounding their build deck.
While this can also occur with dripping atomizers, it’s more prevalent in RTAs due to their more compact chambers and limited building space.
To check if this is the problem, inspect the chamber. If you can see inside without removing the cap, look closely to see if the coil is touching the chamber or appears uncomfortably close to the edge. If contact is happening—or looks likely—the solution is to adjust the coil’s position slightly.
Usually, this can be done by moving the coil up or down and bending its “legs” to create more distance from the cap. If necessary, you may need to unscrew the posts and push the coil closer to the center to ensure it stays away from the chamber walls.
Always make sure the coil has cooled down before attempting any adjustments. For safety, switch off your mod or unscrew the atomizer to prevent accidental firing while you’re working on it.
With proper repositioning, you should be able to resolve the issue and enjoy a smooth vaping experience.
Occasionally, especially when vaping at higher wattages, your coil can simply break during sessions. This creates a gap in the coil, which interrupts the circuit, preventing the flow of current. Your mod will then display a "No Atomizer" error because it can't establish a connection.
It's typically pretty easy to spot this issue, since you'll be able to see the gap in the coil. However, this is a problem that unfortunately can't be fixed. So, in the case of a damaged coil, we're afraid you'll have to buy or build a new one.
the "No Atomizer" message is usually nothing to worry about and can often be fixed with a few simple checks, like tightening your tank, reinstalling the coil, or giving the connection points a quick clean.
Regular vape kit maintenance and proper coil installation can help prevent this from happening again. If the issue continues, it might be time to reach out to your vape’s manufacturer or contact us for further support.
Our friendly customer service team knows all there is to know about vaping, and are happy to help with any problems you may be having with your device.

Hugo is a copywriter with over 3 years of vaping experience. He started his journey when he miraculously quit smoking overnight, waking up one day to find that cigarettes were making him dry-heave. So, he decided to pick up the original Uwell Caliburn and never looked back. Since then, he’s persuaded many of his friends to ditch the cigarettes and buy a vape. Besides vaping, he has a keen interest in history, geopolitics, films and music — with a few obligatory unfinished passion projects to match.